How to Set Up Electric Poultry Netting in 8 Easy Steps
Date Posted: 5 June 2020
Electric poultry netting is an affordable and convenient fencing method for chickens. We show you how to set up your own netting in 8 easy steps.
How to Set Up Electric Poultry Netting
 When it comes to protecting the chickens on your farm, you need an effective fencing option. Chicken poultry netting is an excellent way to keep them in a safe area. It is useful for farmers who either plan to maintain a free-ranging flock or have some of them in a domestic setting.
An even more useful way is to have the fence electrified. Netting is an affordable and convenient fencing method that you can use it to keep your chickens in one area.
When you order one, it will arrive on your doorstep as a complete kit. All you need now is to learn how to install the netting. We show you how in this guide.
How Electric Fencing Works
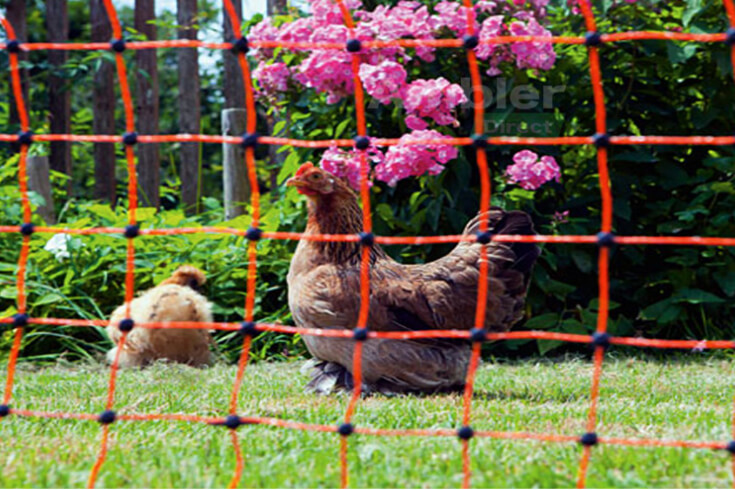
To the animals, the mesh of horizontal and vertical wires is visually appealing. It somehow encourages them to touch these wires with their nose, beak, ears, or sometimes their feet. These parts of the animal are quite sensitive, giving them a small but strong electric shock every time they touch the fence.
All horizontal wire stands are usually connected to a fence energiser, with the exception of the strand on the ground.
This energiser is responsible for sending electric pulses that can shock the animals. Therefore, when the chickens – either accidentally or purposely – touch the fence, they will get a short sharp electric shock. It is just enough to tell them to avoid the net next time.
Here is a breakdown of how it works:
- The energiser forces an electric pulse through the positive (+) terminal, which is linked to the netting.
- This pulse will then travel or move through the conductors. As a result, the fence will give off the excess electrons because of the pressure (in volts) from the conductors.
- Now, when an animal touches the netting, the extra particles will enter the wires and travel through the ground until it reaches the animal.
- The pressurised electrons will then exit the animal’s body and travel through the moisture in the soil. They finally return to the ground rod of the energiser.
- The last stage is when the electrons from the ground go to the negative (-) terminal as the energiser receives them. The total amount of energy returned is parallel to the shock value.
The steps above repeat when an animal touches the fence again.
The netting is only beneficial when the pulse’s strength and its shock effect are of the right amount. If it is too weak, it will not affect the chickens at all. Be sure to consider the following factors when choosing the electric poultry netting kit:
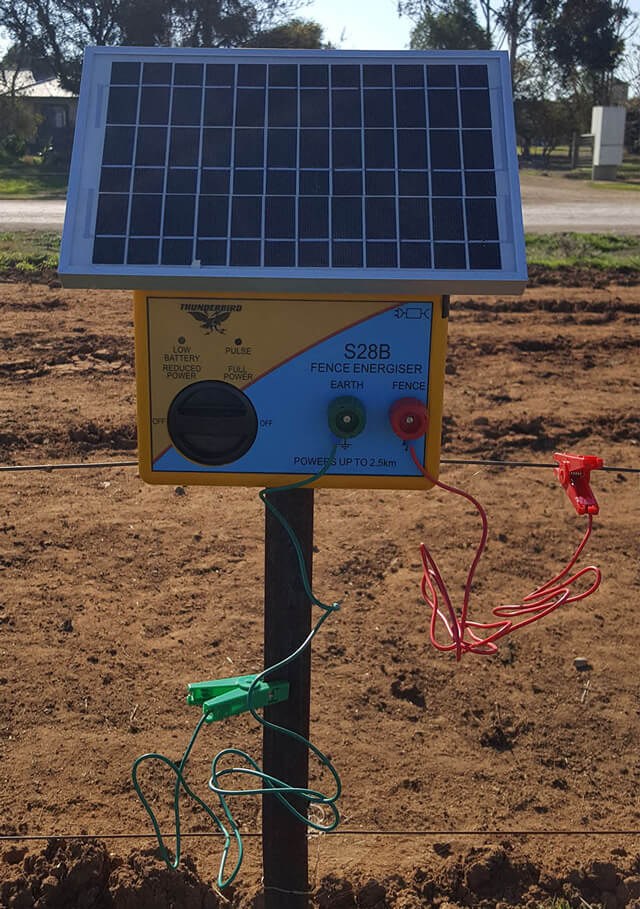
- The output of the energiser in volts determines the potential shock effect on the chicken. Therefore, the higher the volts, the greater the electrocution. To power one 50 metre roll of netting, you will require an energiser that is capable of powering a minimum of 2.5km.
- The conductor and animal resistance can reduce the shock ability based on the number of electrons it can absorb.
- The stability of the soil depends on how many particles are taken in. It can also lower the total electrons for the circuit’s completion.
Electron loss can happen if there is dry ground. Poor insulators allow the electrons to short out, which can impact the shock effect. Some farmers also choose kits based on the convenience they offer. For instance, if it does not need a gate, it is easy to move the end posts and install the fence on another spot.
Benefits of Electric Poultry Netting
 Compared to a permanent fence, electric netting is less expensive. It is also easy to install, even without the help of a professional. A little bit of experience in setting up fences is helpful but not required.
Plus, you can move it wherever you need so that the chickens can access fresh ground. Here are more reasons why you should install electric netting in your farm:
- Effective
The biggest reason why farmers use electric netting is to keep out predators. And it works!
Foxes may be able to jump over it, but they rarely try. After all, these animals are more inclined to climb or go through a barrier.
With these methods of stalking, they can quickly get shocked when in contact with the fence. Because of the pain, these foxes and other predators will try their luck somewhere else.
- Safe
You do not have to worry about the fence harming the animals, whether they are a predator or the chickens themselves.
The netting and its shock can give quick, temporary pain. They may not be injured and wounded, but they will respect the fence. Therefore, they will not try to move towards it again.
- Easy Maintenance
Apart from the straightforward installation instructions, electric netting also has simple maintenance requirements. A weak fence will not work on a hungry fox, which is why you have to pay attention to the netting’s efficiency.
The netting does not require a tremendous amount of power. You can even use a small-capacity solar energiser, which adds to the portability of the fence.
- Sturdy
Poultry netting may be light and transportable, but it does not mean it cannot withstand harsh conditions. The whole setup is made for farms and other outdoor areas. Therefore, it is durable and will not give out easily.
The electric poultry netting will prevent predators, such as wild dogs, quolls, and foxes, from preying on your foraging chickens. It stays effective during the day and at night as well. It adds another layer of protection to the hens’ coop when you are not around to watch over them.
Steps on How to Install Electric Poultry Netting in Your Farm
When correctly installed, the electric poultry netting can keep away predators from your chickens and your plants, too. Set it up correctly so you can get rid of rabbits, feral deer and pigs, possums, and wallabies.
These animals can threaten the peace of your prized vegetable gardens or flower beds. If the chickens get curious, the electric fence can tame them by forcing them to stay in place.
But how do you properly set up the netting? Here are the steps to follow:
- Determine the energiser requirement of the netting first.
Unlike single-wire fences, electric poultry netting needs a larger-capacity energiser. If you use one net, we recommend a 0.2 joule energiser. For two nets, the ideal capacity is 0.5 joule, three nets need 0.7 joule, and five nets will require 1.5 joules.
However, avoid going beyond 2.0 joules; otherwise, the power will burn the fine wires in the netting. If you require more than five nets, you will have to use a separate energiser for the additional netting. Make sure, though, that the systems are at least 2.5 metres away from each other, such as one in either side of a farm entrance, in compliance with relevant Australian Standards.
- Prepare the site.
Before you start placing all the materials in their final positions, you should first make sure the site is ready. Flatten or mow the area first, mainly if there is vegetation that is over 10cm tall. An option could be to drive a vehicle around, which makes tracking easier through the grass or weeds. Then, you can follow the wheel track, which is where you will install the fence.
The ground should be a bit moist, which enables the electricity to travel back to the stake faster and more efficiently. Drive the earth stake at least a metre into the ground near the fence, allowing contact with the moist subsoil.
Keep the earth stake at least 10 metres away from any electrical system to avoid any interference.
- Ready the netting and the other materials you will use.
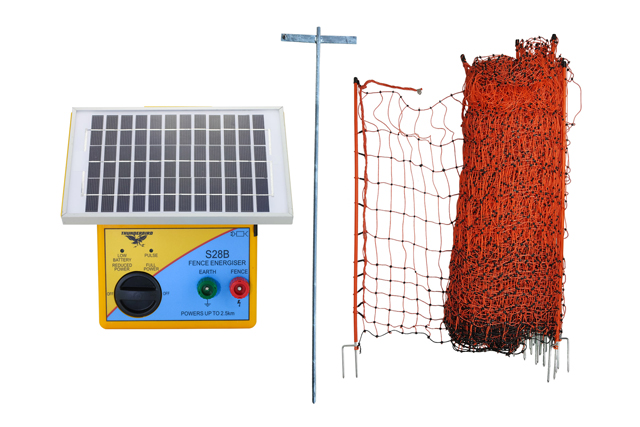 If you have a netting kit, you should already have all the necessities with you. It includes the poultry netting, energiser, and an earth stake.
The next step is to unroll the net. Avoid tangles as much as you can. Take all the posts and grip them firmly together as a group.
You can then lift them all in front of you. With this technique, you get to unroll the net in a series of “pleated folds.” Each of these pleats is attached to the posts. Then, you want to lay the unrolled pleats onto the ground.
- Install the netting.
Gather the first or beginning post, which should have two strings attached. Place it where you like on the ground. It should be where you would like your access to be to the area with the poultry netting.
The next thing to do is to get the last post in the net and bring it around to meet the post you just inserted. They should be beside each other once you are done, specifically if you have a netting kit. With a kit, you will only need about a 1.5-centimetre gateway section of space between the first and last posts.
Make sure they are both secure by checking how each post is inserted to the ground. You should not be able to pull them out easily.
Take another post and place it as securely as the other two into the ground. Each shorter section of the netting should be as taut as possible before you take the other remaining posts. Proceed with the installation of the posts you have left until you have an area for the chickens to stay in.
- Secure the netting even more.
Get the metal buckles or any attachment which you can find on the ends of the net. Tie them around the first and last post to fix them together. Fasten the clips so the posts and the enclosures will stay strong and steady.
Keep the netting taut to ensure all wires, except the bottom wire, do not touch the ground. If the plastic posts bend as you go around each corner, you can tie them to an insulated post so that it stays upright.
Repeat the steps above to the remaining corners.
- Fix some issues that you see.
Sometimes, the tension in the net can be a problem. A good solution is to use an extra stake, which you can interweave into the netting. It helps increase the tension of the whole net. Make sure that you secure this additional post into the ground. Gather the top line of the netting and attach it onto the cap of the post. Also, it helps to install the post at a 90-degree angle based on the net.
If you ever need to remove or relocate the netting, you only need to do the same thing during installation, except in reverse. Lay all the plastic posts flat before picking each end and allowing the nets to fall. They should form pleats just like before setting them up. Never roll the netting like you would with a carpet. It will not only make untangling tricky, but it can also damage the nets.
- Power up the netting.
Once everything is secure, and all posts are erected, you can now connect the power connectors by hand. Electrifying the netting requires you to install a ground earth rod first. Then, utilise the jumper clips, which you will use to connect the net to the energiser. If you already have an existing electric fence, you can join the jumper clips to it.
Remember that the bottom line is not live. Therefore, once you have the net in place, examine the area and see that there are no lumps and bumps where the animal can get under.
- Finish the job.
Wire the energiser and make sure you have a secure connection with the net and the earth spike. Check the power by turning it on and using a fence tester to see the voltage. Does it say 3,000 volts or higher? If so, then congratulations! Your system is working.
Although it is doable to install the electric poultry netting on your own, it does not hurt to have someone to assist you along the way. Without question, electric netting is the answer to those looking for a user-friendly and affordable alternative to permanent fencing.